 Here you can add,
delete and rename texture groups. GameMaker: Studio permits you to
assign each of the graphics resources (sprites, backgrounds, and
fonts) to different texture groups to try and optimise the number
of texture swaps that the hardware does at any given time in your
game. For that to work, you need to define the necessary texture
groups from this tab, and then go through each of the appropriate
resource types and select the group you wish it to belong to from
the drop down menu. note that there is also a button, "Check", for
checking to see if any empty texture groups exist, ie: a group that
has not got any sprites currently assigned to it. This can be
useful when you've been changing graphics resources and need to
check to see if you have any groups not used, or before deleting a
group to make sure it's not got anything assigned to it.
Here you can add,
delete and rename texture groups. GameMaker: Studio permits you to
assign each of the graphics resources (sprites, backgrounds, and
fonts) to different texture groups to try and optimise the number
of texture swaps that the hardware does at any given time in your
game. For that to work, you need to define the necessary texture
groups from this tab, and then go through each of the appropriate
resource types and select the group you wish it to belong to from
the drop down menu. note that there is also a button, "Check", for
checking to see if any empty texture groups exist, ie: a group that
has not got any sprites currently assigned to it. This can be
useful when you've been changing graphics resources and need to
check to see if you have any groups not used, or before deleting a
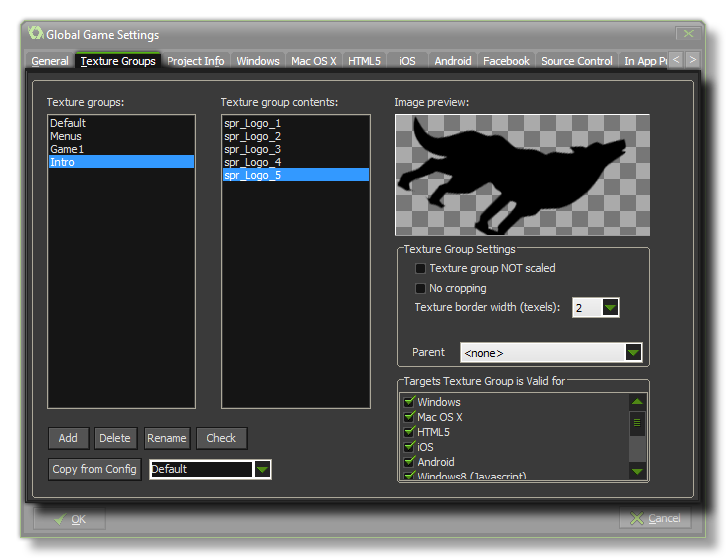
group to make sure it's not got anything assigned to it.Once you have defined texture groups and assigned sprites to them you can see them in the list marked Texture Group Contents, and clicking on any of the sprites in this list will show them in the image preview window on the right. This is particularly helpful when working on large projects and you need to be able to see which sprites have been assigned to which group.
NOTE: If the sprites have multiple sub-images, then only the first sub-image is shown in the preview window.
Texture Groups are also linked to the Configurations settings. What this means is that you can define texture groups for each individual configuration of your game, and then set the sprite or background asset assignments to these different groups and it will be "remembered" when you change to a different configuration. One use for this is that you could make an iPad configuration and for that create 2048x2048px texture pages. You would then close the Global Game Settings and assign all the graphics assets to the appropriate texture group, and when finished, you would then change to a different configuration (for HTML5, for example) and from the Texture Page tab, create new texture groups that are 512x512px, assigning the assets to these new groups. There is also a button at the bottom of the page that permits you to copy texture group settings from one configuration to another.
You can also choose to export (or not) any given texture group to any given platform by simply ticking/un-ticking the appropriate boxes from the Target Texture Group Is Valid For section of the window. In this way your configurations can be designed specifically for each target module and you can be sure that only those assets necessary for that platform will be compiled into your final game.
There is one other section on this page too, the Texture Group Settingand here there are extra options that are for use only in special circumstances: