Backgrounds
Backgrounds are another of the basic resources
that you can use in GameMaker: Studio.
These are usually large images that are used as backgrounds (or
foregrounds) for the rooms in which the game takes place, but they
can also be large images composed of many smaller ones called
tiles which you can then place individually in your room to
create complex visual designs for levels with far less processing
overhead than you would get with objects and sprites.
To create a background resource in your game, use the Create
Background option from the drop-down Resources menu or
use the corresponding button on the toolbar. Either of those will
cause the following window to open: 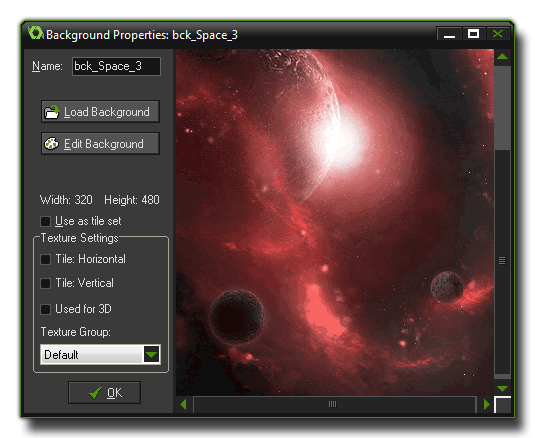 As with all resources, you must
give a name to your backgrounds for reference within GameMaker:
Studio and so you can identify them easily, although you should
note that the actual name itself is really just a variable which
holds a number that "points" to the resource, in this case a
background. It's best to give each background a descriptive name so
that you can identify at a glance whether a particular resource is
a background or an object or anything else, and many people do this
by prefixing or suffixing the resource with the letters "bck". For
example, the above image could be called bck_Horizon or
Horizon_bck.
As with all resources, you must
give a name to your backgrounds for reference within GameMaker:
Studio and so you can identify them easily, although you should
note that the actual name itself is really just a variable which
holds a number that "points" to the resource, in this case a
background. It's best to give each background a descriptive name so
that you can identify at a glance whether a particular resource is
a background or an object or anything else, and many people do this
by prefixing or suffixing the resource with the letters "bck". For
example, the above image could be called bck_Horizon or
Horizon_bck.
Below the "Name" section are the buttons that enable you to load,
save or edit a background image. If you select "Load Background",
you will get the standard file selector where you can choose
supported image file (PNG, GIF, BMP, JPG.) and also tell GM to make
that image opaque (remove transparency), or make it transparent
(this takes the colour from the bottom left hand corner pixel as
the base colour to make transparent) or to smooth the edges of the
background (only when it is transparent). Once you have selected
the file and the options, clicking the "Open" button will load the
background into GameMaker: Studio ready to be used in your
games. Editing the background can be done within GameMaker:
Studio too, and we have a whole section in the Advanced Use
part of the manual that deals with this here.
Be careful with using large backgrounds, especially if your target
device is HTML5 or one of the smaller mobile devices, as large
backgrounds need more memory and this could be a problem later when
you try to compile your game. You should also be aware that
backgrounds in GameMaker: Studio are designed to tile and
this means they have overlapping pixels on either side, so if you
see any strange artefacts (transparent lines, extra pixels, etc.)
then you should possibly be using sprites instead for the graphical
effect you wish to achieve.
Editing Backgrounds
For editing backgrounds, GameMaker: Studio has its own
included Image Editor which is quite powerful, although not as
complete as many dedicated art packages available. For information
on how to use it, please see the section
More About Sprites: Editing Subimages as there is exactly the
same set of tools available for backgrounds as for sprites.
Backgrounds as Tiles
Sometimes you want to have a background image broken up into a
set of tiles, which basically means, one large image composed of
different sub images that can all be linked together. When creating
rooms you can then add these subimages at different places to
create beautiful levels with graphical effects that are "cheap" in
that they use very little processing power to draw. Please note
that tiles are purely graphical and do not have most of the
properties you would find in an object or a sprite which is why
they are fast. To use a background as a tile set, check the box
labelled Use as tile set and the background window now
changes to look as follows: 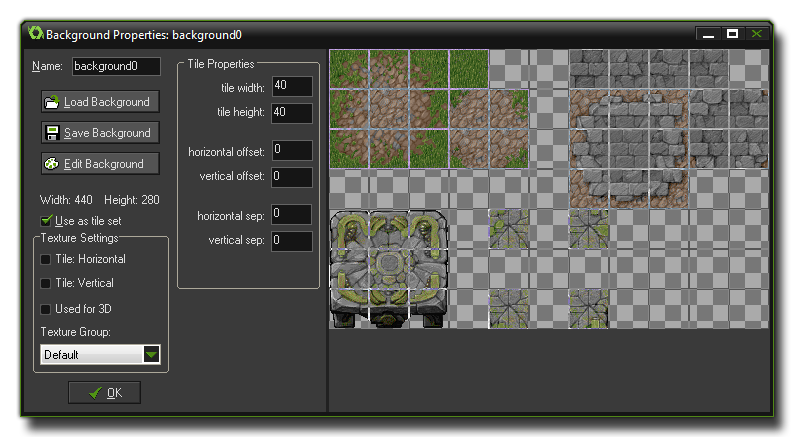 Now you can indicate a
number of settings for the tile set, like the width and height for
each tile (only one size can be given, so better make sure that all
tiles in the set have the same size. If you have different sizes,
create two or more tile sets). You can also indicate an offset (in
pixels) where the top left-most tile starts as well as a separation
between the tiles (in pixels) between the tiles themselves. For
more information on tiles see the section in the Advanced Use part
of the manual More
About Backgrounds, and for information on how to use tiles in
the room editor you can go to the section More About
Rooms.
Now you can indicate a
number of settings for the tile set, like the width and height for
each tile (only one size can be given, so better make sure that all
tiles in the set have the same size. If you have different sizes,
create two or more tile sets). You can also indicate an offset (in
pixels) where the top left-most tile starts as well as a separation
between the tiles (in pixels) between the tiles themselves. For
more information on tiles see the section in the Advanced Use part
of the manual More
About Backgrounds, and for information on how to use tiles in
the room editor you can go to the section More About
Rooms.
© Copyright YoYo Games Ltd. 2018 All Rights Reserved