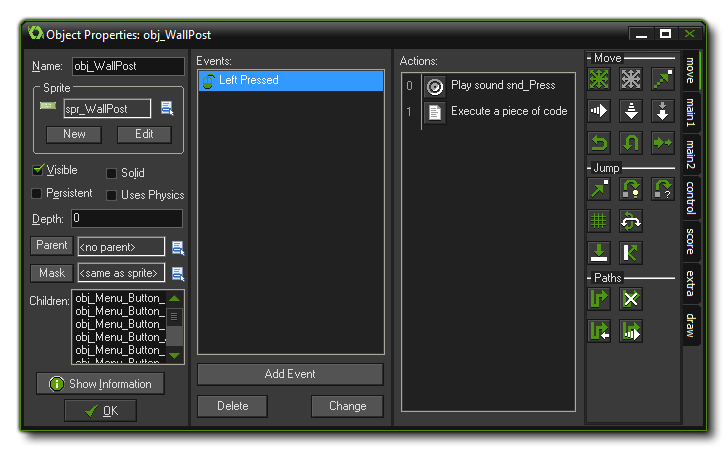
For an object to actually do something, we need to give it actions, but we also need to tell it when to complete these actions. To do that we use EVENTS. An EVENT is a special moment in which we can place certain actions and be sure that those actions will only happen when that EVENT is triggered. There are a large number of different events that can take place and a large number of different actions that you can let your objects take too. For example, there is a Create Event that is performed only when the object gets created. Actually, that's not quite true! Objects are never created, rather they are used to create instances... An instance is a copy of the base object, complete with all the same events and actions, and it's these that are used in your games. Think of an object as the blueprint, and the instance as a manifestation of that blueprint. For example, to add motion to a ball object when we create an instance of it in a room, we would add a motion action to the create event of the object.
Another example of an event is the Collision Event. This is triggered when two instances of any objects collide in the game room. In such a case you can make the instance stop or reverse direction or any number of other actions, like play a sound effect or add points to a score. Further events include the Keyboard Event (for when the player presses a key), Mouse Event to detect mouse buttons, and the Draw Event which is where we can tell each instance of an object to draw whatever we want. There are still more events for each object and these are covered further along in the manual.
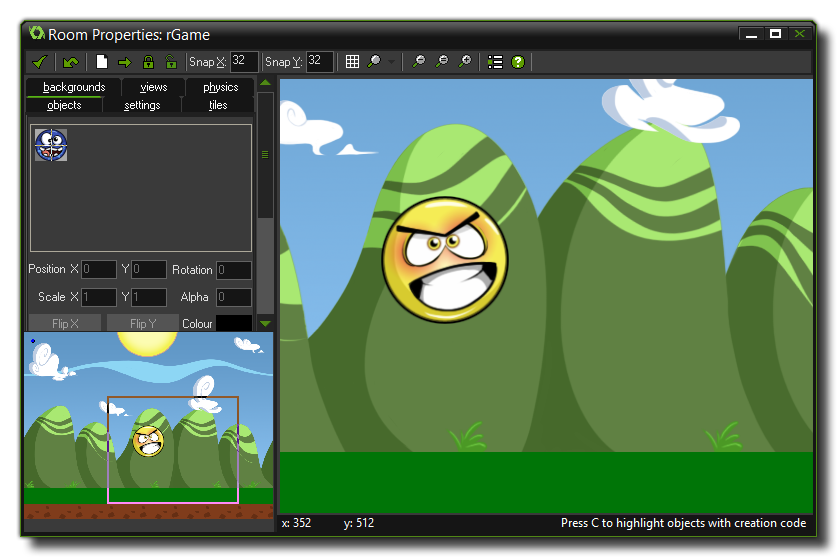
Once you have defined your objects it is time to define the rooms in which they will be placed. Rooms can be used for levels in your game or to show information or even to hold a start menu. There are actions to go from room to room so that you can create button objects that, when pressed, will move the player from one room of the game to another. It should also be noted that if you do not have any rooms in your game then GameMaker: Studio will not run your game. But how do you create a room? GameMaker: Studio has a complete editor for creating these areas and in the editor you can add and change many aspects of how the room will look and play. For example, you can add backgrounds in that can be either a simple colour or an actual image. Such background images can be created in GameMaker: Studio with its own editor, or you can load them into the resources from files. Backgrounds can actually be made to do a lot of things but for the time being, just consider it as something that makes the rooms look nice. Next, you can place one (or multiple!) instances of any objects you have created into the room. For example, you want to have a large walled area in your game, so you would define one wall object and then place multiple instances of that object in your room to create large, complex walled areas. The same can be done for enemy objects too! Just make one enemy object, and then place multiple instances within your room to get a whole level created from only a few base objects. Here is an example of how the room editor typically looks:
Once you have completed the design of your rooms, you are ready to run the game. The first room to be shown is always the first room in the main list of rooms and it will be run at the start. Now the instances you have placed will come to life because of the actions defined in their object create events and they will start reacting to each other due to actions placed in the object collision events. They will also react to the player using the actions placed in any keyboard or mouse events.
That covers the two most important things in GameMaker: Studio, but there are a few more! All together they are called resources and assets, and in the main screen of GameMaker: Studio you can find them on the left-hand side in a space called the resource tree. Here is a list of them and you should know that they will all play a crucial role in creating your game: